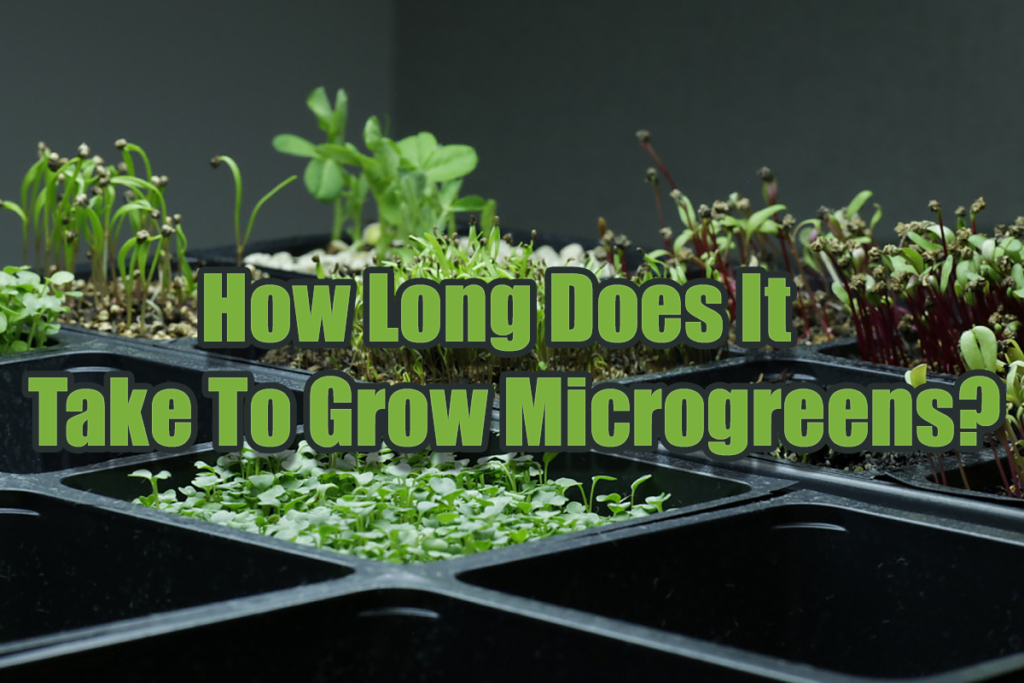
Microgreens are a great way to spruce up any dish and indoor garden. They are nutritional, flavorful, and look great. Starting an indoor garden can sometimes take weeks or months, but with microgreens, you only have to wait a fraction of the time.
Most microgreens take about two weeks to grow to harvest, some a little longer. At the longest, very few microgreens can take a month to grow to harvest. They can be grown indoors throughout the whole year with proper care.
It doesn’t take much time to have a beautiful indoor garden of microgreens. They are an excellent addition to any meal, whether cosmetic or for nutrition. While they are very quick to go, there are certain things to consider for their care such as:
- Room temperature and climate
- Lighting
- Growing medium
- Fertilizer
- Disease prevention
- Harvest and aftercare
Before You Grow Microgreens
Every plant takes a different amount of time to grow to harvest. There are also different stages of growth to follow. Some may take days and others, weeks. When it comes to microgreens, this process tends to be reasonably fast.
The first step to growing microgreens is deciding which ones you want to plant. Here are some great ideas for microgreens. There are also wonderful mixes of microgreens available to get more nutrition and a mixture of flavors and textures.
- Alfalfa has a lot of nutrition and a nutty flavor. It goes well with sandwiches and salads.
- Fennel has a slight licorice flavor. Add it to soups are an extra kick.
- Mung bean has a buttery, nutty taste. It goes well on top of rice and salads.
- Sage has a strong flavor. It goes well in most autumnal dishes like roast turkey and pumpkin sage cream sauce.
- Wheatgrass has a strong, bitter flavor. Juicing wheatgrass is very common and contains dozens of vitamins.
Once you decide the microgreens you want to plant, you will need to get the necessary equipment such as:
- Seeds: There are a variety of seeds available. Don’t be afraid to try mixes either. Make sure your seeds are organic and haven’t been treated with a fungicide. This can affect the quality of your microgreens.
- Growing medium: Most growers recommend using a mixed soil that has plenty of nutrients. Be sure to add some compost or buy a potting mix that has compost in it.
- Growing container and cover: There are many options for where you can grow your microgreens. You can use a growing tray or even better, an old plastic clamshell container. Be sure to poke holes at the bottom and top of the container to allow for drainage and airflow.
- Drainage tray: This is especially important if you are growing your microgreens indoors because you don’t want to leave a mess underneath and around your plant.
If you live in an area with drastic temperature changes or cannot regulate the temperature and airflow of the growing location, you should invest in a heat mat, grow lights, and a circulation fan.
Once you plant the seeds and water them, it will take a few days for the seeds to germinate.
Germination is when a seed starts to successfully grow into a plant. Germination can occur in soil or water.
Before seeds grow leaves, they are known as “sprouts”. Sprouts grow in water, and when you eat them, you are eating the seeds and roots. Once the sprout starts growing leaves, it is a microgreen. When you eat microgreens, you are eating what is above the growing medium, not the roots. Some larger seeds require soaking before sowing.
Microgreens Growth Time
Microgreens are great plants to grow indoors because they do not take a long time to grow. They are also wonderful to teach plant growth to children because they do not take very long to grow.
Overall, microgreens tend to take two weeks to grow. Some other ones can take as long as five weeks, but it is a very short time compared to growing other plants such as broccoli (100-150 days) and kale (55-75 days). When you have microgreens, you aren’t having the full plant, just the result of the germination process.
Here are the growth times for some of the most popular microgreens. You can get a full list here.
- Arugula: 10 to 15 days
- Cilantro: 16 to 25 days
- Parsley: 26 to 30 days
- Radish: 10 to 15 days
- Rainbow Chard: 16 to 25 days
Microgreen Care During Growth
When you have planted your seeds, it is relatively easy to take care of them and require little maintenance. This is especially great because of the short time it takes for them to grow. As long as you have the necessities to grow your microgreens, they will be happy and tasty.
Room Temperature and Climate
Overall, the temperature at which microgreens grow best is about 70 degrees Fahrenheit or room temperature. Some microgreens require different needs, so research your greens before planting.
They also grow very well in a humid environment. Try to keep them in a container with good airflow and make sure the growing medium stays moist. You can keep it moist by using a spray bottle.
Microgreens also require sunlight. Once they start sprouting, make sure to move them to a space that receives the plants’ suggested amount of sunlight.
Growing Medium and Fertilizer
As stated earlier, it isn’t recommended to grow microgreens in basic soil. Try to find a mix that has compost in it so your greens get the most nutrients they can. Some growers even recommend using a soilless mixture or growing them in foam sheets. You can also grow them hydroponically.
Most growers agree that microgreens don’t need fertilizer because they get all of the nutrients they need from water and sunlight.
Disease Prevention
Microgreens grow very fast compared to most plants, but bacteria can grow faster. You can prevent your microgreens from growing bacteria by:
- Maintaining good airflow
- Not overwatering
- Using the correct amount of sunlight
- Not letting water stay on the greens themselves and making sure to only water the soil
- Maintaining a room temperature environment that doesn’t get too hot
Microgreen Harvest and Aftercare
It’s been about two weeks since the seeds have been planted and they should be ready for harvest. You will know when your microgreens are ready to harvest because they have a few leaves and stalks about 3 to 7 inches long.
To harvest your microgreens you will need a pair of scissors or kitchen shears. Grab the greens in a bunch at the top and then cut just above the growing medium.
Do not pull out your microgreens. This can damage the plant and most microgreens can regrow a few times after harvesting.
When washing the microgreens, you should place them in a colander in your sink and rinse them with cold running water. Afterward, you can try them on a paper towel or a kitchen towel. Don’t let the greens sit in water or stay wet too long because this will cause them to get wilted, soggy, and destroy the taste.
If you aren’t going to eat the microgreens immediately, they should be placed in an airtight container or plastic bag with a dry paper towel on top to absorb any excess moisture they give off. They will last about three days in the refrigerator, but you should try to eat them immediately upon harvesting.
Here is a great video showing how to harvest your microgreens.
Microgreen Regrowth
Like many plants, microgreens can regrow after being harvested. Since it doesn’t take too long for them to grow, keep an eye on your plants to see if they are regrowing. You may be able to get a good three or four harvests out of your plants. If you are looking to regrow your plants, be sure to cut them just below the lowest leaves.
It isn’t always recommended to allow microgreens to regrow because some growers state it can affect the quality and nutrition of the plants. Research your plant before regrowing it to see what is best to do.
It can be challenging to reuse the growing medium for growing again because you have to remove all of the roots, which can look like a tangled mess. Usually, once the plant doesn’t yield any more greens, it’s best to start over.
A good way to prevent waste is to compost your leftover growing medium. You can add the leftover growing medium into compost as-is and won’t need to modify it outside of breaking it up. This is great because you aren’t wasting any growing medium and you will have compost available for when you grow microgreens again or want to use it in your garden.
Conclusion
Microgreens are a great way to brighten up your home and plate. They pack a ton of nutrients and add different flavors and textures to almost every meal. What makes them even better is that they don’t take long to grow and require little maintenance. You can even keep up the growth cycles and regrow microgreens or compost the remainders.